Articles for the Outdoor Enthusiast

Gardening & Plant Care
Practical guides to help you grow with confidence. From seed starting to seasonal care, learn what works — and why.

Outdoor Design & Sustainability
Smart ideas for beautiful, lasting outdoor spaces. Built with natural materials and responsible choices in mind.

Garden to Table
Simple ways to enjoy what you grow. Recipes, preserving tips, and ideas that carry your harvest from garden to plate.

Companion Planting
By pairing plants thoughtfully, you can create a balanced, productive garden with fewer chemicals and more natural support.

Planning your Spring Garden
To start your spring garden, its important to plan ahead and get ready for the growing season.
Gardening & Plant Care

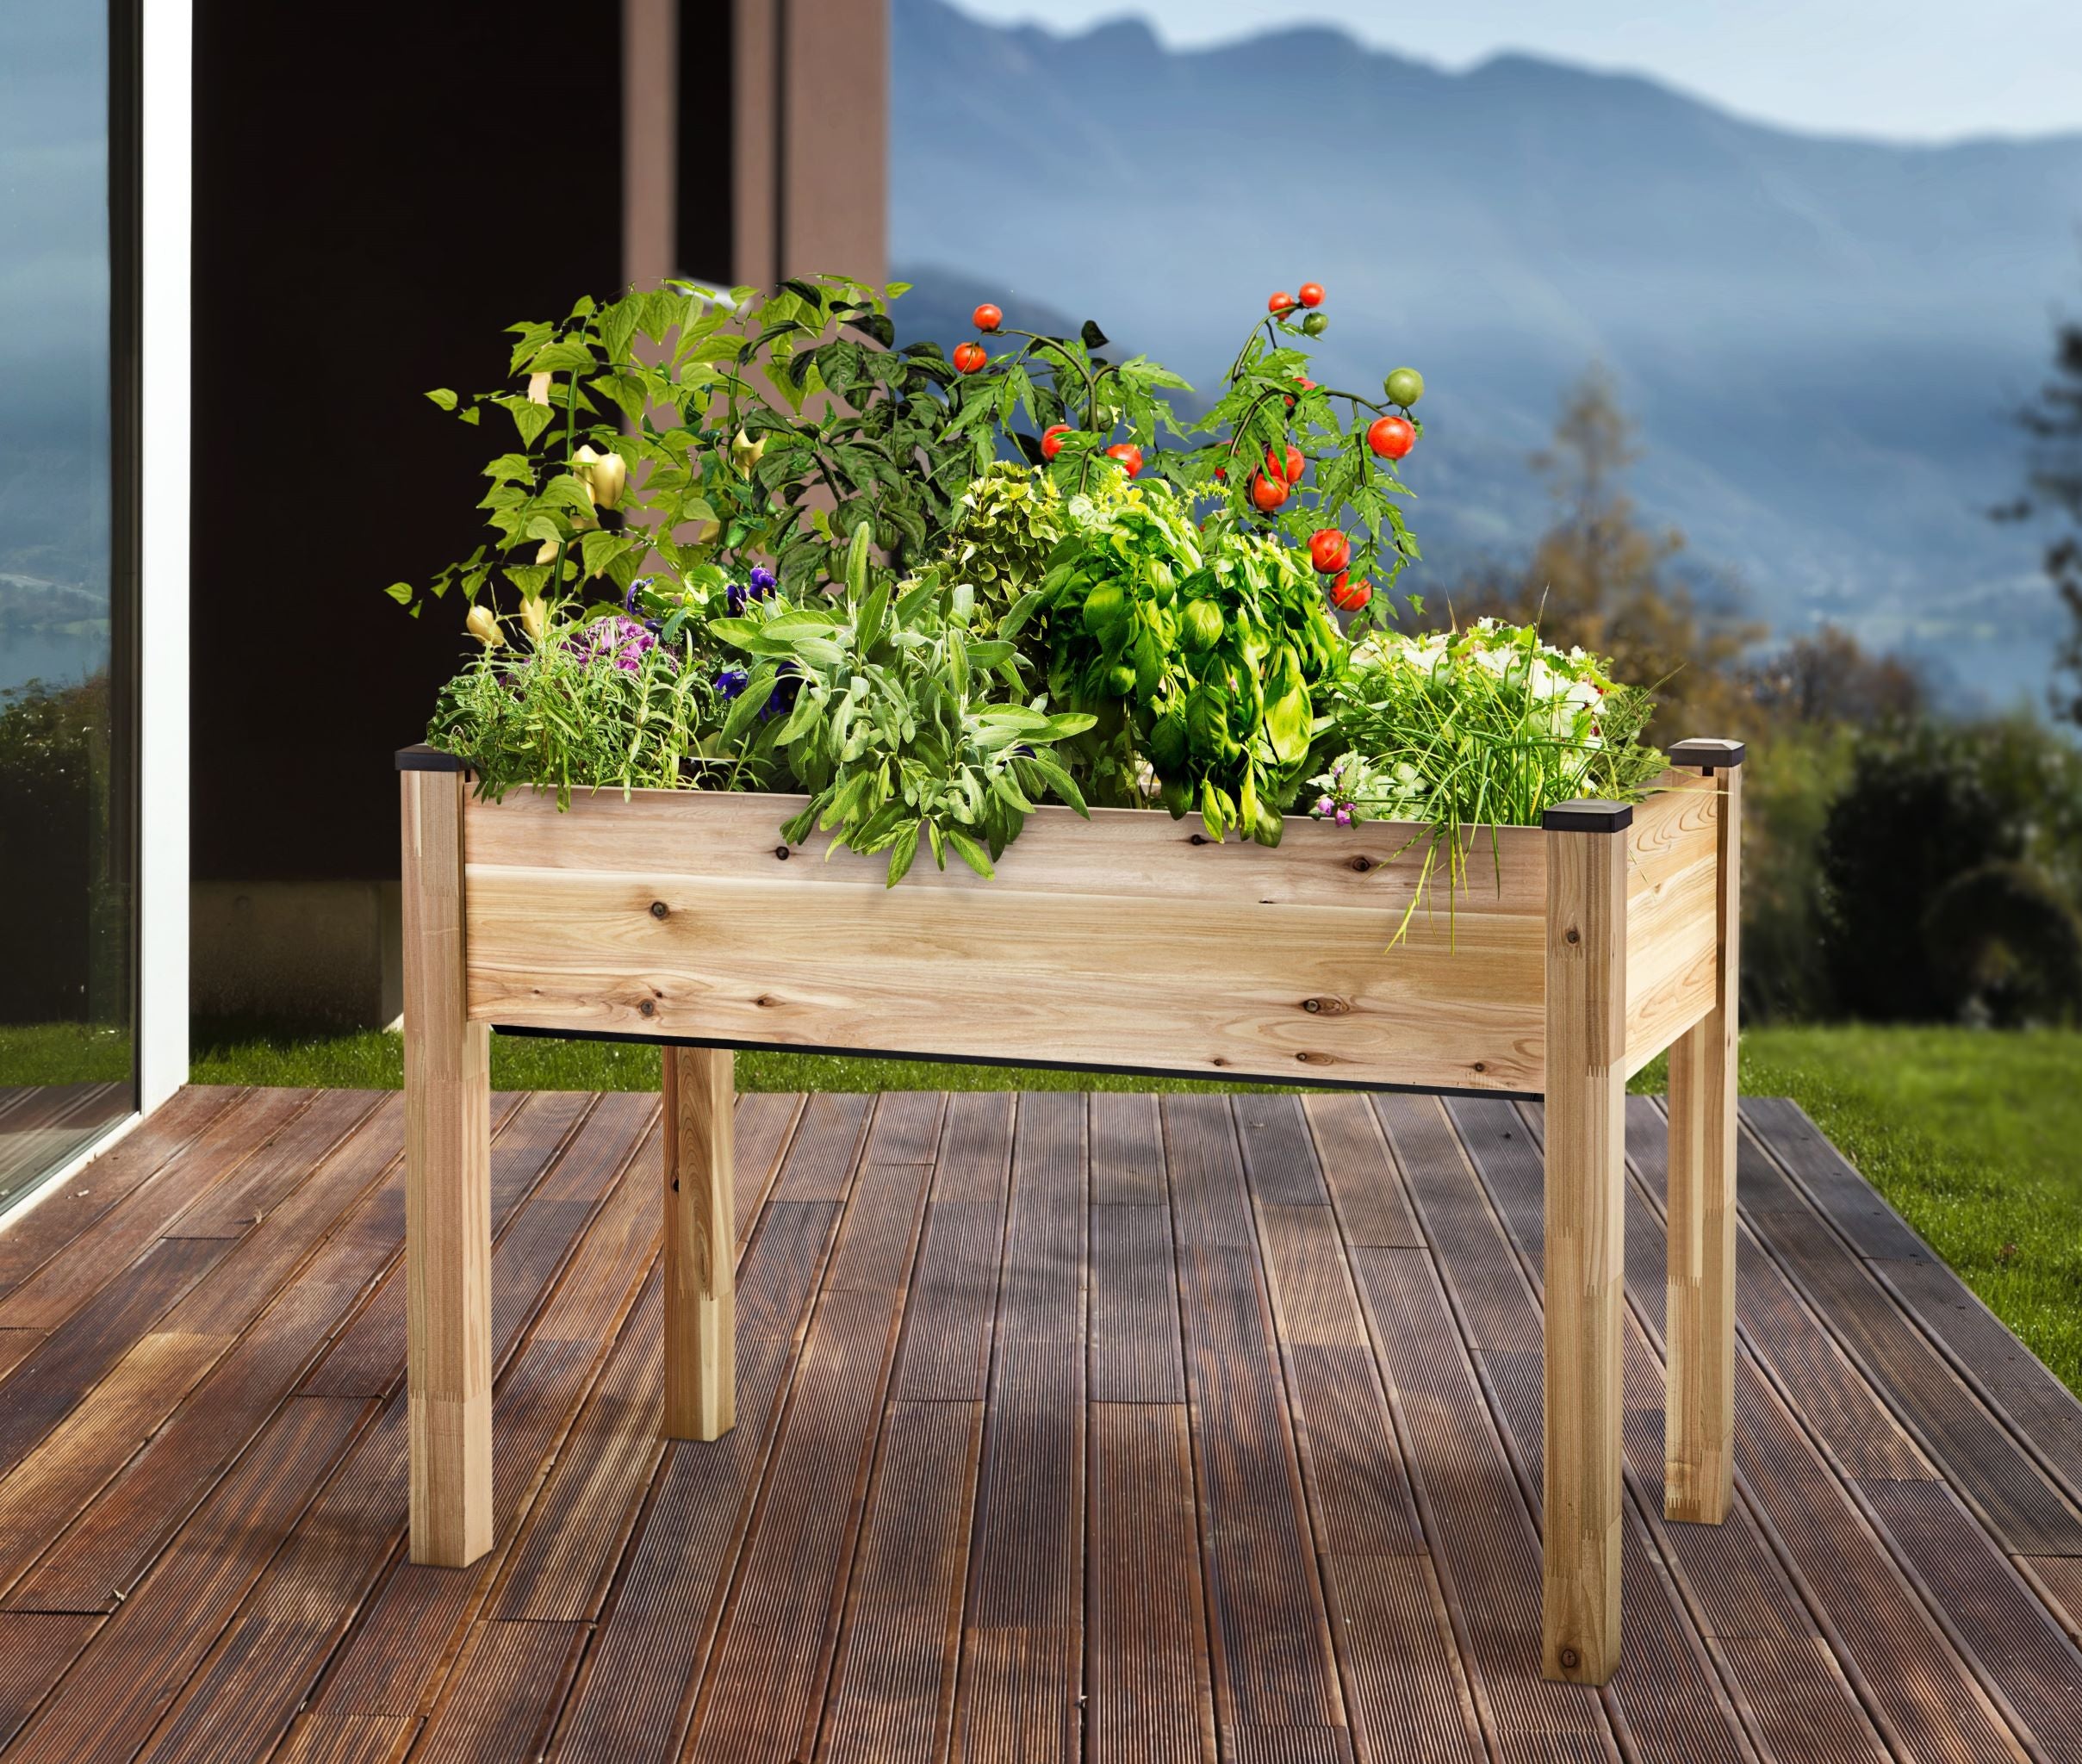
How to Grow Fresh Herbs in an Elevated Garden
Fresh herbs are one of the easiest and most rewarding ways to connect the garden to the kitchen. They do not require a large yard, complicated garden plan, or years of experience. With the right setup, a few well-chosen herbs can provide fresh flavor for everyday meals all season long. An elevated self-watering garden bed is especially well suited for growing herbs. It keeps plants easy to reach, helps maintain more consistent moisture, and makes harvesting simple. Whether placed on a patio, deck, balcony, or near the kitchen door, an elevated herb garden can turn a small space into a useful kitchen garden. Why Herbs Are a Great Choice for Elevated Garden Beds Herbs are ideal for elevated garden beds because they are compact, productive, and useful in small amounts. A few basil plants can provide fresh leaves for pesto, pasta, salads, and sandwiches. Rosemary can be used with roasted potatoes, chicken, bread, and grilled foods. Sage can be used fresh during the growing season or dried for fall and winter recipes, including Thanksgiving stuffing. Unlike some vegetables that require more space or deeper root systems, many culinary herbs grow well in contained spaces when they have good sun, quality soil, and proper drainage. An elevated bed also makes herbs easier to use. When herbs are planted close to the kitchen and at a comfortable working height, they are more likely to be harvested regularly. That matters because herbs are not just decorative plants. They are ingredients. Fresh herbs can quickly improve everyday meals. A handful of basil can finish pasta. Chives can brighten potatoes or eggs. Parsley can add freshness to soups, salads, and roasted vegetables. Rosemary and thyme can add depth to simple roasted foods. Choose Herbs You Actually Cook With One of the most common herb garden mistakes is planting too many varieties simply because they look or smell interesting at the garden center. While it can be fun to experiment, a kitchen herb garden is most useful when it is planted with herbs that will actually be used. A practical elevated herb garden might include: Basil Rosemary Parsley Chives Sage Thyme A compact cherry tomato plant can also be added if the planter has enough space and sunlight. While tomatoes are not herbs, they pair naturally with basil and make the garden even more useful for summer meals. When choosing herbs, think about the meals you already make. Basil is excellent for pesto, tomato dishes, pasta, and salads. Rosemary works well with potatoes, chicken, bread, and grilled foods. Parsley is one of the most useful herbs to have on hand because many recipes call for just a small amount. Chives are easy to grow and useful for eggs, soups, salads, and potatoes. Sage and thyme are especially good for roasted foods, poultry, beans, squash, and fall recipes. If an herb is not something you cook with often, it may not be worth the space in a small elevated planter. The goal is not to grow the most unusual herb collection. The goal is to grow a kitchen garden that earns its place. Start with Sun Most culinary herbs grow best with plenty of sunlight. A good goal is at least six hours of direct sunlight per day. Sun-loving herbs include: Basil Rosemary Thyme Oregano Sage If a patio, deck, or backyard receives strong sun for much of the day, it may be a good location for an elevated herb garden. If the space gets a little less light, choose herbs that are more tolerant of partial sun. Herbs that can handle a little less sun include: Parsley Chives Mint Cilantro Tarragon In hot climates, some herbs may struggle during intense summer heat. Dill, for example, can be difficult to grow in strong Texas sun and may do better during cooler parts of the growing season. The best location for an elevated herb garden is one that balances plant needs with everyday use. Close to the kitchen is ideal. Close to a hose is helpful. Close to a place where the planter will be seen and remembered is even better. Use Good Soil Herbs are generally easy to grow, but they do need proper drainage. This is especially important for Mediterranean herbs such as rosemary, thyme, oregano, lavender, and sage. These herbs prefer soil that drains well and does not stay soggy. For an elevated self-watering garden bed, use a high-quality potting mix or raised bed mix. Avoid filling the planter with regular garden soil from the yard. Garden soil can compact in a container, which makes it harder for roots to breathe. It can also hold too much moisture and become very heavy, especially when wet. That extra weight can put unnecessary stress on an elevated planter. A good herb garden soil mix should be light enough to drain well but rich enough to support healthy growth. A simple mix may include: Quality organic potting mix or raised bed mix A small amount of compost Perlite or pumice if the mix feels heavy A gentle organic fertilizer, used lightly Avoid over-fertilizing herbs. Too much fertilizer can lead to fast leafy growth with less concentrated flavor. Herbs should be healthy and productive, but they should still taste like herbs. How Self-Watering Helps Self-watering elevated garden beds help provide more consistent moisture by using a reservoir below the planting area. Instead of relying only on surface watering, plants can draw moisture from below as needed. This is especially helpful during hot weather or busy weeks when regular watering may be harder to manage. Consistent moisture can benefit herbs such as: Basil Parsley Chives Cilantro Mint Other herbs, such as rosemary, thyme, oregano, and sage, generally prefer slightly drier conditions. In a self-watering planter, the key is to avoid overwatering from the top. Let the reservoir do its job, check the water level as needed, and pay attention to how the plants look. There is no need to overcomplicate the planting plan. In one elevated self-watering planter, the goal is usually to create a practical kitchen herb garden, not separate growing zones for every plant. Choose herbs that will be used often, give them quality soil, avoid overcrowding, and harvest regularly. What to Plant in One Elevated Herb Garden For a useful elevated kitchen herb garden, start with a small group of reliable herbs. A good starter combination includes: Basil Rosemary Parsley Chives Sage Thyme This combination can support a wide range of everyday cooking, including pesto, roasted potatoes, soups, eggs, stuffing, fish, chicken, vegetables, tomato salads, and simple garnishes. Basil should be given a little extra room if possible. It may look small at planting time, but once it starts growing well, it can take up more space than expected. Mint is best kept separate unless it is planted in its own container. Mint is useful and delicious, but it spreads aggressively and can quickly take over a small herb garden. Harvest Often Harvesting is one of the most important parts of growing herbs. Many herbs become fuller and more productive when they are harvested regularly. Do not wait too long for the plant to become “big enough.” Herbs are meant to be used. Basic harvesting tips: Pinch basil regularly to encourage bushier growth. Snip chives near the base. Cut parsley from the outside stems first. Harvest small sprigs of rosemary, thyme, and sage as needed. Remove basil flower buds to keep the plant focused on producing leaves. Once basil begins flowering, the flavor of the leaves can change and the plant may slow down leaf production. Pinching off flower buds helps extend the harvest. An elevated bed makes regular harvesting easier because the plants are visible, accessible, and close to where they will be used. Drying Herbs for Winter When herbs grow well, they can quickly produce more than can be used fresh. Drying herbs is a simple way to preserve the harvest for later. Good herbs for drying include: Sage Thyme Rosemary Oregano Parsley Sage is especially useful to dry for fall and winter cooking. Dried sage can be used in stuffing, poultry dishes, beans, squash, and soups. To dry herbs, harvest healthy stems in the morning after the dew has dried. Rinse only if needed, and make sure the herbs are completely dry before storing. Tie small bundles and hang them upside down in a dry, airy place, or lay the leaves on a clean screen or towel until fully dry and crumbly. Once dry, store herbs in clean jars away from heat and direct light. Label the jars clearly. Dried herbs can look very similar once stored, and labels make them much easier to use later. Fresh herbs are ideal during the growing season, but dried herbs are practical, useful, and a great way to extend the value of the garden into colder months. Best Herbs for Beginners If you are new to growing herbs, start with reliable varieties that are useful in everyday cooking. BasilGreat for pesto, pasta, salads, sandwiches, and tomato-based dishes. Basil grows best with sun and consistent moisture. RosemaryExcellent with potatoes, chicken, bread, grilled foods, and roasted vegetables. Rosemary likes sun and good drainage. SageUseful with stuffing, poultry, squash, beans, and fall dishes. Sage prefers sun and soil that does not stay too wet. ParsleyA versatile herb that works in soups, salads, sauces, vegetables, and many recipes that need a fresh finish. Parsley can tolerate a little less sun than some herbs. ChivesEasy to grow and useful for eggs, potatoes, soups, dips, and salads. ThymeSmall but flavorful. Thyme works well with roasted vegetables, chicken, soups, stews, and sauces. It likes good drainage. MintDelicious in tea, drinks, fruit, sauces, and desserts. Mint should be grown in its own container or kept carefully contained. Common Herb Garden Mistakes Herbs are forgiving, but a few common mistakes can make them harder to grow. Planting too many herbs too close togetherSmall starter plants can quickly become crowded. Give herbs enough room to grow and allow for airflow. Using heavy garden soil in a containerGarden soil can compact, hold too much moisture, and add unnecessary weight to an elevated planter. Putting sun-loving herbs in too much shadeMost herbs need several hours of sunlight each day to grow well and develop good flavor. Overwatering woody herbsRosemary, thyme, oregano, and sage prefer good drainage and do not like soggy roots. Letting basil flower too earlyPinch basil regularly and remove flower buds to encourage continued leaf growth. Growing herbs that will not be usedA kitchen herb garden is most successful when it is planted with herbs that fit the way meals are actually cooked at home. Why an Elevated Self-Watering Bed Makes Sense An elevated self-watering garden bed makes herb gardening more approachable and practical. It allows herbs to be grown on a patio, deck, balcony, or small outdoor space. It reduces bending and keeps plants easier to reach. It also helps keep moisture more consistent, which is especially helpful during hot weather or busy weeks. For anyone who wants a useful kitchen garden without taking on a large in-ground garden, an elevated self-watering planter is a simple place to start. It keeps fresh ingredients close, makes harvesting easy, and turns a small planting space into something that can be used almost every day. From the Garden to the Kitchen Herbs are one of the simplest ways to make food taste finished. A small amount of fresh basil can change a bowl of pasta. Rosemary in hot oil can make roasted potatoes smell like something special. Parsley can brighten a dish that needs freshness. Sage can bring warmth and depth to fall recipes. That is what makes herbs such a good bridge between gardening and cooking. They do not require acres of space. They do not require a complicated garden plan. They simply need a sunny spot, good soil, regular harvesting, and a place close enough to the kitchen that they will be used. Final Thoughts Growing herbs in an elevated self-watering garden bed is one of the easiest ways to create a practical kitchen garden. Start with herbs that are already part of the way you cook. Give them sun, use good soil, avoid overcrowding, harvest often, and dry extra herbs for later use. A garden does not need to be large to be useful. Sometimes the best garden is the one that gives you basil for pesto, rosemary for potatoes, sage for stuffing, parsley when a recipe needs just a little, cherry tomatoes for snacking, and fresh flavor right outside the door.
En savoir plus
Companion Planting: Simple Pairings for a Healthier Garden
Growing the Right Plants Together Companion planting is the practice of growing certain plants near each other to support growth, improve flavor, or help reduce common garden challenges. While it’s not a strict formula, thoughtful pairings can encourage a more balanced and productive garden. Why Companion Planting Works Different plants offer different benefits. Some attract pollinators, others may help deter insects, and some simply grow well without competing for nutrients. When plants are thoughtfully arranged, your garden can feel fuller and more naturally supported. Easy Companion Plant Pairings If you’re just getting started, these simple combinations are easy to try: Tomatoes + BasilA classic pairing. Basil fits neatly around tomato plants and adds variety to the bed. Carrots + OnionsThese grow well side by side and make efficient use of space. Lettuce + RadishesRadishes grow quickly and can be harvested before lettuce fully matures. Cucumbers + NasturtiumsNasturtiums add color and can help draw attention away from vegetables. Mixing Heights and Growth Styles Companion planting also works visually. Combining upright plants with leafy greens or trailing varieties creates layers in your garden bed. This not only supports plant health but adds dimension and interest. Elevated planters make it especially easy to organize pairings and keep combinations contained. Keep It Simple Companion planting doesn’t require memorizing complex charts. Starting with just one or two pairings can help you observe what works well in your space. Pro Tip: Try adding herbs throughout your garden beds. Many blend easily with vegetables and support pollinator activity. Companion planting is about thoughtful combinations, not rigid rules. With a little experimentation, you can create a garden that feels balanced, productive, and naturally vibrant.
En savoir plus
How Elevated Planters Help Reduce Garden Pests
How raised planters can help reduce common garden pests.
En savoir plus
Outdoor Design & Sustainability

Why We Use Cedar (And Why Retailers Like Costco Agree)
Every Choice Tells a Story I used to think buying a planter was just about picking a size and hoping I didn’t kill the basil. But somewhere along the way, I realized that every backyard choice we make—every material, every design—has a ripple effect. That’s why at CedarCraft, we don’t just use cedar. We believe in it. Deeply. Cedar isn’t just beautiful and durable—it’s also the heart of our sustainability mission. And as it turns out, that mission is shared by some pretty big names… including Costco, and our other retail partner. More on that in a bit. The Roots of CedarCraft: Born From a Road Trip and a Really Good Idea Let me tell you a little story. In the early 2000s, our founders, Glen and Carol, found themselves at a crossroads. Literally, unsure of what came next, they hit the road in search of meaning, wood, and maybe a better way to make a living. Carol had noticed cedar grilling planks popping up at places like Williams-Sonoma. What if they could make those planks more accessible and ensure they came from responsible, sustainable sources? Their search led them through the forests of the Pacific Northwest, eventually landing at Gorman Bros. Lumber, a sustainable mill in British Columbia known for its commitment to forest stewardship. The match? Perfect. The mission? Clear. Repurposed With Purpose: From Smart Sourcing to Stunning Design At CedarCraft, sustainability doesn’t mean cutting corners. It means making smart, intentional choices—like sourcing solid cedar from responsibly managed forests and working with partners who prioritize forest health over fast profits. While our story began with finding ways to use rescued wood, today we proudly use sustainably sourced cedar to craft our signature pieces—including our self-watering elevated cedar planters and the beautifully designed Bali Pergola. What hasn’t changed is our commitment to reducing waste, maximizing material use, and creating products that honor the forests they come from. Why Western Red Cedar? Sustainability You Can See—And Smell We choose Western Red Cedar for a lot of good reasons. It’s naturally rot-resistant, chemical-free, and weathers like a dream—making it ideal for outdoor planters, pergolas, and raised beds. No pressure-treated mystery materials here. Just real wood that’s built to last (and smells amazing) But cedar isn’t just a pretty face. It’s part of a bigger promise. Our cedar is sourced from responsibly managed forests across North America, primarily in Canada and the northern U.S. Working with trusted partners like Gorman Bros.—a leader in FSC® and PEFC-certified practices—means our supply chain stays close to home and focused on forest health. CedarCraft supports local jobs in Canada and the US, reduces transportation emissions, and keeps quality at the forefront. When you grow vegetables, flowers, or herbs in one of our self-watering elevated cedar planters, or lounge under a Bali Pergola, you’re not just investing in your outdoor space—you’re backing a whole system built on responsible forestry and thoughtful design. Growing Forests, Not Just Tomatoes: Our Partnership with the National Forest Foundation - Here’s something we’re truly proud of: CedarCraft supports the National Forest Foundation’s reforestation efforts across the U.S. to helps restore ecosystems, fight climate change, and bring life back to damaged lands. Further, we believe in third-party accountability. That’s why our materials are PEFC- certified—a globally respected sustainability standard. PEFC Quick Guide Forests are managed to the highest environmental, social & economic standards Materials are traceable through the entire supply chain PEFC products meet procurement and sustainability expectations Supports the long-term health of forest ecosystems globally Look for the PEFC label—it’s more than a symbol, it’s a promise. Honored to Be Aligned: Our Shared Values with Costco CedarCraft is proud to be an honored seller at Costco, and not just because they have great snacks. Costco partners with brands that meet high standards for sustainability, quality, and integrity. We’re proud to be one of them. This partnership is about more than shelves and barcodes—it’s about shared values. Values that put people and the planet first. Direct From Us, Direct From the Source When you shop with us at Cedarcraft.com, you get the full CedarCraft experience—stories, sourcing, impact, and all. From our Bali 8x8 Cedar Pergola to our best-selling self-watering elevated planters, we make it easy to bring sustainability home. Everyday Sustainability: Tips for a Greener Backyard Sustainability doesn’t stop at checkout. Here are five simple ways to keep the mission going at home: Collect rainwater to hydrate your garden naturally Compost leaves and veggie scraps to feed your soil Mulch your clippings to keep soil cool and hydrated Look for certified products (like PEFC or FSC) when shopping It’s not about perfection—it’s about momentum. From Mischelle: Beauty With Purpose I have two teenage boys. I’d love to leave them a world that’s not so polluted they need an inhaler to play tennis—that’s assuming I don’t strangle them before they graduate. So yeah, sustainability matters to me. Not just as a feel-good buzzword, but as a way of pushing back—one planter, one pergola, one conscious choice at a time. If you’re here for beauty and purpose, you’re in the right place. Explore our self-watering plantersCheck out the Bali Pergola Together, let’s build something that lasts—naturally.
En savoir plus
Using Planters to Define Outdoor Spaces
How planters can shape and organize your outdoor space.
En savoir plus
Add Shade and Comfort to your Outdoor Space
Simple and intentional design ideas to add shade to your backyard.
En savoir plus
From Garden to Table - Recipes & More

Creamy Cashew Pesto
There’s something about fresh basil that feels like summer in a bowl. Bright. Fragrant. Just a little wild. This creamy cashew pesto is rich, smooth, and surprisingly versatile. It’s not just for pasta (though it’s excellent there). Spread it on grilled vegetables, swirl it into soups, spoon it over chicken, or use it as a sandwich spread. Why Cashews? Traditional pesto uses pine nuts, but roasted cashews bring: · A naturally creamy texture · A slightly sweet, buttery flavor · A more budget-friendly option · Easy substitutions (almonds, walnuts, or pecans work well) The result is a silky pesto that blends beautifully and feels almost luxurious. Ingredients · 3 cups fresh basil leaves (packed) · 1 ¼ cups roasted cashews (or any nut you prefer) · 1 ½ cups freshly grated Parmesan cheese · 1 tablespoon sugar · 4–6 cloves garlic (depending on your love of garlic) · ¼ cup fresh lemon juice · ⅛ cup balsamic vinegar · ⅛ cup water · ⅓ cup extra virgin olive oil · Salt and pepper to taste Instructions 1. Add all ingredients to a food processor. 2. Blend for 6–8 minutes (or longer if needed) until completely smooth and creamy. 3. Scrape down the sides as needed to ensure no chunks remain. 4. Taste and adjust salt, pepper, lemon, or garlic to your preference. 5. Store in a sealed container in the refrigerator. Tips for the Creamiest Texture · Blend longer than you think you need to. Cashews take a few extra minutes to become silky smooth. · If it feels too thick, add a tablespoon of water or olive oil at a time until it reaches your desired consistency. · For ultra-smooth pesto, soak cashews in warm water for 15–20 minutes before blending. Storage Store in an airtight container in the refrigerator for up to 5 days. To help preserve the vibrant green color, drizzle a thin layer of olive oil over the top before sealing. Freezes well for up to 2 months.If you make this, don’t be surprised if half of it “disappears” during the tasting phase. That’s just quality control.
En savoir plus
BBQ Spice Rub
This bold BBQ spice rub builds a savory crust on brisket, ribs, pork, and vegetables—especially when paired with a True Fire Cedar Grill Plank for subtle smoky sweetness.
En savoir plus
Pesto-Stuffed Pork Tenderloin
The real magic happens when creamy pesto meets tender pork and a hint of cedar smoke. This simple, budget-friendly cut transforms into a feast with just a few ingredients and the unmistakable aroma of grilling on a cedar plank. Ingredients · 1 pork tenderloin · 1 cup creamy cashew pesto (see recipe) · 1 cup crumbled feta (or mozzarella) · Optional: fresh spinach or other vegetables · Salt and pepper to taste Instructions 1. Soak the plank: Submerge a True Fire Cedar Grill Plank in water for at least 2 hours. For added flavor, try soaking it in apple cider vinegar or wine. 2. Prep the pork: Butterfly the tenderloin by cutting lengthwise down one side (not all the way through), then the other side, until it opens flat. 3. Fill it up: Spread pesto inside, sprinkle with cheese, and add spinach if desired. Roll it back up and secure with toothpicks. Season the outside with salt and pepper. 4. Grill: Place the tenderloin on the soaked grill plank, set it on the grill, and close the lid. Cook 15–20 minutes, until the internal temperature reaches 140°F (pork safe temperature is 145°F, so remove it 5 degrees early). 5. Rest and serve: Let it rest for 5 minutes before slicing. Serve warm and enjoy. The Backyard Payoff The True Fire Cedar Grill Plank keeps the pork moist, adds a subtle sweetness, and fills the backyard with that irresistible cedar aroma. Kids devour it. Dogs beg shamelessly under the table. And the scent alone might have the neighbors wondering where that herby, garlicky, smoky goodness is coming from. Here’s to backyard feasts on a budget and the simple joy of cooking outdoors.
En savoir plus
Gerdening Adventures Blog

How to Grow Fresh Herbs in an Elevated Self-Watering Garden Bed
For a long time, herbs were the only thing I could grow. Not tomatoes. Not peppers. Not some gorgeous, overflowing, magazine-worthy garden that looked like it had its own staff. Herbs. And honestly? I loved them for that.Herbs gave me a little gardening confidence after I had killed pretty much every house plant I had ever tried to grow. Basil, rosemary, sage, parsley — they were forgiving enough to let me try again, useful enough to make dinner better, and pretty enough to make me feel like maybe I did know what I was doing after all.My old chef ways also have a very soft spot for fresh herbs. There is just no comparison between a handful of basil picked right before dinner and the sad little plastic clamshell from the grocery store that somehow manages to wilt before you even get it home. Fresh herbs wake food up. They make simple meals feel elegant. They make roasted potatoes smell like a restaurant slaved over them. And when you grow herbs in an elevated self-watering garden bed, they become even easier to love. You do not need a huge yard. You do not need to dig up half the lawn. You do not need to become the kind of person who says things like “my herbaceous border” with a straight face.You just need a sunny spot, good soil, a few herbs you actually cook with, and a garden bed that makes it easy to water, harvest, and keep going. Why Herbs Are Perfect for an Elevated Garden Bed Herbs are one of the best things to grow in an elevated garden bed because they do not need a lot of room to be useful. A few basil plants can become pesto. A rosemary plant can carry you through roasted potatoes, chicken, bread, and anything that needs to smell like you tried harder than you did. Sage can be dried for Thanksgiving stuffing, which is honestly the kind of long-game gardening I can appreciate.And the best part? Herbs are meant to be used.That is one reason I like them in an elevated garden bed. When herbs are tucked away in the far back corner of the yard, they become something you admire from a distance. When they are right outside the kitchen door, they become a part of dinner…That matters.If I have to put on shoes, find clippers, walk across the yard, and fight through mosquitoes for three basil leaves, I am probably not doing it on a Tuesday night. But if the basil is right there — waist high, easy to reach, growing in a self-watering bed on the patio — suddenly I am the kind of person who finishes pasta with fresh herbs.That is the kind of gardening I do. The Kitchen Garden I Actually Use There are two kinds of herb gardens. There is the dreamy one where you plant seventeen varieties because the plant tags looked charming at the garden center. I have done this. Lemon verbena got me one year. It smelled wonderful. It sounded fancy. It looked like something a person with a very thoughtful herb garden would grow. Then I got it home and realized I did not really know what to do with it.One of my dogs loved to eat it, so I guess there was that.I did eventually put some in pesto, but you could not really distinguish the lemon flavor. Which felt like a lot of effort for an herb whose main contribution was apparently making my dog happy.And then there is the herb garden you actually cook with.I have learned to aim for the second one.This year, I planted basil — lots of basil — rosemary, parsley, chives, sage, thyme, and cherry tomatoes. The parsley is mostly because I always forget parsley at the store, so when I need just a little bit for a recipe. Not a whole bunch. I can just snip snip from the garden. I also did cherry tomatoes as an experiment, and so far they have been fairly successful. But my first batch of mini red juicy tomatoes got eaten by critters. Now, as soon as they are red, I bring them in. That is the beauty of growing your own.You do not have to buy a whole package when you need a tablespoon. You just walk outside and snip what you need.Basil is the one that pulls me right back to pesto. I have written about creamy pesto before, but this version is different. This is the chunky, rustic, scoop-it-with-a-spoon kind. The kind where you still see bits of basil, nuts, and garlic, and it feels more like something from my kitchen than something from a jar.Start with Sun Most culinary herbs want sun. A good goal is at least six hours of direct sunlight a day.That is especially true for herbs like: Basil Rosemary Thyme Oregano Sage If your patio, deck, or backyard gets strong afternoon sun, that may be a great place for an elevated herb bed. If your space gets a little less light, you can still grow herbs, but you may want to choose varieties that are more tolerant of partial sun.Good options for a little less sun include: Parsley Chives Mint Cilantro Tarragon Dill is one I want to love, but I have never been able to grow it well. I think it may just be too hot in the Texas sun. Or maybe dill and I are still working things out. The nice thing about an elevated bed is that you can place it where it makes sense for both the plants and your life. Close to the kitchen is ideal. Close to a hose is also ideal. Close to where you will actually remember it exists is probably the most ideal. Use Good Soil — Herbs Do Not Like Wet Feet Herbs are generally not fussy, but they do care about drainage. This is especially true for Mediterranean herbs like rosemary, thyme, oregano, lavender, and sage. These herbs do not want to sit in heavy, soggy soil. They like things a little more on the dry side. For an elevated self-watering garden bed, start with a good-quality potting mix or raised bed mix. Do not scoop regular garden soil from the yard and dump it in.Garden soil can get compacted in a container, and compacted soil makes it harder for roots to breathe. It can also be too heavy for an elevated planter, especially once it’s wet. That extra weight puts unnecessary stress on the planter. A good herb bed soil mix should feel light enough to drain but rich enough to support healthy growth.A simple mix might include: Quality organic potting mix or raised bed mix A little compost Perlite or pumice if the mix feels heavy A gentle organic fertilizer, used lightly The “used lightly” part matters. Herbs do not need to be babied with too much fertilizer. In fact, too much fertilizer can sometimes give you lots of leafy growth with less flavor. We want healthy plants, but we also want herbs that taste like something. How Self-Watering Helps Self-watering garden beds are helpful because they make moisture more consistent. Instead of relying only on surface watering, the reservoir helps provide water from below.That does not mean you can plant herbs and forget they exist. I wish. But it does mean your plants have a little more backup, especially during hot weather or busy weeks. For herbs, that steady moisture can be especially helpful for basil, parsley, chives, cilantro, and mint. These herbs tend to like more consistent water.Rosemary, thyme, oregano, and sage usually prefer things a little drier, so in a self-watering planter, the key is not to overdo it from the top. Let the planter do its job, keep an eye on the reservoir, and pay attention to how the plants look.I would not overcomplicate this too much. If you have one elevated self-watering planter, you are probably not creating separate little climate zones for every herb. You are creating a practical kitchen herb garden. So plant the herbs you use most, give them good soil, do not overcrowd them, and harvest often. That is usually a much better plan than trying to turn one planter into a botanical seating chart. What to Plant in One Elevated Herb Garden If you are just getting started, think in terms of usefulness, not variety for variety’s sake. A good elevated kitchen herb garden might include: Basil Rosemary Parsley Chives Sage Thyme You can also tuck in a compact cherry tomato plant if your planter has enough space and sun. It is not an herb, obviously, but basil and tomatoes are kitchen best friends, and there is something very satisfying about walking outside and coming back with both. That is enough variety to cover pesto, roasted potatoes, soups, eggs, stuffing, fish, chicken, vegetables, tomato salads, and all the little “this needs something green” moments that happen in real kitchens.Give basil a little extra room if you can. Basil looks innocent when it is small, but once it gets happy, it will take up space. Keep mint separate unless you are ready for mint to make major life decisions on behalf of the entire planter. Mint is wonderful, but it is not shy. And if there is an herb you do not cook with, skip it. This is not a test of your garden-center sophistication. It is a kitchen garden. Harvest Often — That Is the Whole Point This may be my favorite part of growing herbs: the more you use them, the better many of them grow. Do not wait forever for the plant to become “big enough.” Herbs are not decorations. They are ingredients.Pinch basil regularly to encourage bushier growth. Snip chives near the base. Cut parsley from the outside stems first. Take small sprigs of rosemary, thyme, and sage as needed.With basil especially, watch for flowers. Once basil starts flowering, the flavor can change and the plant may slow down leaf production. Pinching off flower buds helps keep the plant focused on making leaves.This is also where an elevated bed makes a difference. When your herbs are easy to see and reach, you use them more. And when you use them more, they become part of your cooking rhythm. A little basil in eggs. Chives on potatoes. Rosemary in roasted vegetables. Sage in stuffing. Parsley on almost anything that needs to look less like you forgot the garnish. Drying Herbs for Winter One of the best things about growing herbs is that, if they do well, they can go from “I hope this lives” to “what am I supposed to do with all of this?” surprisingly fast. That is a good problem.When you have more herbs than you can use fresh, drying them is a simple way to save some for later. Sage, thyme, rosemary, oregano, and parsley are all good candidates for drying. Sage is especially useful to dry for winter cooking. I love the idea of growing sage in summer and using it later for Thanksgiving stuffing. That feels very full-circle to me — a little patio garden showing back up at the holiday table. To dry herbs, harvest healthy stems in the morning after the dew has dried. Rinse them only if needed, and make sure they are completely dry before storing. You can tie small bundles and hang them upside down in a dry, airy spot, or lay the leaves on a clean screen or towel until they are fully dry and crumbly.Once dry, store the herbs in a clean jar away from heat and direct light. Label the jar, because dried green leaves have a way of becoming mysterious very quickly.Fresh herbs are wonderful, but dried herbs have their place too. They are practical. They stretch the season. And they make winter cooking feel a little more connected to the garden.Best Herbs for Beginners If you are new to herb gardening, start with the reliable ones. Here are my favorite beginner-friendly herbs for an elevated self-watering bed: BasilGreat for pesto, pasta, salads, sandwiches, and anything tomato-based. Needs sun and consistent moisture. RosemaryPerfect for potatoes, chicken, bread, and grilled foods. Likes sun and good drainage. SageWonderful with stuffing, poultry, squash, beans, and fall dishes. Likes sun and soil that does not stay too wet. ParsleyUseful in almost everything. More than a garnish. Tolerates a little less sun than some herbs. ChivesEasy, pretty, and useful for eggs, potatoes, soups, and salads. ThymeSmall but mighty. Great for roasted vegetables, chicken, soups, and sauces. Likes good drainage. MintDelicious in tea, drinks, fruit, and sauces. Keep it contained unless you want a mint empire. A Few Common Herb Garden Mistakes Herbs are forgiving, but there are a few mistakes that can make things harder than they need to be. Planting too many herbs too close togetherThey look tiny at first. They do not stay tiny. Using heavy garden soil in a containerIt can compact, hold too much moisture, and add unnecessary weight to an elevated planter. Putting sun-loving herbs in too much shadeThey may survive, but they probably will not thrive. Overwatering rosemary, thyme, oregano, and sageThese herbs like good drainage and do not want soggy roots. Letting basil flower too earlyPinch it back so it keeps making leaves. Growing herbs you do not actually useIf you do not cook with it, you probably will not harvest it. Unless your dog eats lemon verbena, in which case I suppose it has found its purpose. Why an Elevated Self-Watering Bed Makes Sense An elevated self-watering garden bed is not just about convenience, although I am very much in favor of convenience. It makes herb gardening more approachable. You can place it on a patio, deck, or near the kitchen. You can garden without bending as much. You can keep herbs close enough to use them. And with the self-watering reservoir, you get more consistent moisture and a little forgiveness during busy weeks.For CedarCraft, this is exactly the kind of gardening I love: beautiful, useful, and built for real life. Not perfect-life gardening. Real-life gardening. The kind where you forget things sometimes. The kind where dinner needs to happen soon. The kind where one fresh ingredient can make the whole meal feel better. Final Thoughts Growing herbs in an elevated self-watering garden bed is one of the easiest ways to connect the garden to the kitchen. Start with herbs you already love. Give them sun. Use good soil. Do not overcrowd them. Harvest often. Dry what you cannot use right away. Let the garden become part of your cooking instead of another thing on your to-do list.Because sometimes the best garden is not the biggest one.Sometimes it is the one that gives you basil for pesto, rosemary for potatoes, sage for Thanksgiving stuffing, parsley when you forgot it at the store, cherry tomatoes for snacking, and just enough confidence to keep growing. Mischelle Raftery, The Backyard Hopeful Before I became a gardener — or at least before I became someone willing to call herself a gardener without laughing — I was a chef. And chef habits do not really leave you.You still think about what makes food taste finished. You still know that a little fresh basil can change a whole plate of pasta. You still understand that rosemary in hot oil is not just an ingredient; it is a smell that tells everyone dinner is going to be good. You still know parsley is not “just a garnish” when it is doing its job.That is why herbs feel like the perfect bridge between gardening and cooking. They do not ask for acres of space. They do not require a perfect garden plan. They just sit there, right outside the door, waiting to make dinner better.And for me, that is what makes an elevated herb garden worth growing. It is not about becoming a perfect gardener. It is about having fresh ingredients close enough to use, beautiful enough to enjoy, and practical enough to earn their spot.
En savoir plus
How Redoing Our Backyard Brought Our Family Together
For most of the 48 years we’ve lived here, half of our backyard wasn’t really ours. We used the space like it was ours, but technically it was theirs. And because of that, we never really did much with it. There was always this feeling in the background that one day, half of what felt like our backyard could disappear. It’s hard to get too attached to a space when you’re never quite sure how long you’ll have it. Then our neighbor finally sold their house. Developers came in, redid the property, and put up a fence right on the actual property line. Just like that, everything changed. The guessing was over. The line was clear. For the first time, the yard was really ours. That is what kicked all of this off. At first, it was just the fence. But once the fence went up, it felt like something shifted. We started looking at the yard differently. Not like this vague in-between space we had never fully claimed, but like something we could finally care about. Something we could shape. Something we could make nicer, more useful, and honestly, more us. And that is when one project turned into about ten. Everyone helped put up our cedar fence, and from there the whole thing sort of snowballed. The fence made us start thinking about the yard. The yard made us think about how we wanted to use the space. Then came the cement deck, the plants, the rocks, the mulch, the borders, the elevated planters, and what feels like at least a hundred trips to the local DIY store. It was a lot. It was messy. It was dusty. It was not always efficient. But it was ours. What I did not expect was how much it would bring our family together. My husband’s older son moved in with us, and he and his dad had been separated for years with pretty limited interaction. Life had created a lot of distance there. But somewhere in the middle of this backyard project, they found themselves working side by side. Planning and laying a cement deck. Moving things. Figuring things out. Planting, spreading rocks, making decisions, solving problems. Just being in it together. And sometimes that is how closeness starts coming back. Not always through some big emotional conversation. Sometimes families come back together not around a table, but around a yard. Around a garden. Around the kind of work that gives everybody something to do with their hands while the relationship quietly starts mending a little in the background. That is what this season has felt like for us. The kids got involved too, which made it even better. What could have just been another house project slowly turned into something shared. Everybody had a part in it. Everybody had opinions. Everybody helped. And even though there were still the usual project moments, changing plans, extra store runs, little frustrations, there was also something really good happening underneath all of it. My piece of it was the side yard. I worked with my boys to plan the process, take measurements, set up borders, and lay mulch. We talked through ideas, figured things out as we went, and made more trips to the DIY store than I even want to count. My son even helped choose the plants for the elevated planters, which made me smile. It was one of those small moments that probably would not seem like a big deal to anybody else, but to me it was. It felt like one more little thread being woven into this whole thing. That is probably what I keep coming back to. Yes, we are redoing the backyard. Yes, we are making it prettier and more functional. Yes, we are adding garden spaces and trying to make it feel more intentional than it ever has before. But underneath all of that, we are also making a place for our family to happen. A yard can just be a yard. A garden can just be another thing to take care of. But when people work on it together, it starts becoming more than that. It becomes a place where conversations happen more easily. It gives teenagers a reason to show up and help. It gives parents and kids something to build side by side. It gives people who have been distant a way to get a little closer without having to force all the words first. That has been the unexpected gift of all of this. We started because the yard was finally ours, and for the first time, it felt worth investing in. But what has made it meaningful is not just how it looks. It is what has happened while we have been building it. The fence. The deck. The rocks. The mulch. The planters. The plants. The measuring. The mistakes. The store runs. All of it has turned this into more than a backyard project. It has turned it into shared ground. The backyard is still a work in progress. There is still more to do, more to plant, more to shape, and definitely more store runs in our future. But it already feels different now. Not just because it looks different, but because of what has happened here. We thought we were fixing up the yard. What we were really doing was growing into it together. Mischelle is a writer, backyard hopeful, and everyday gardener who loves creating outdoor spaces that feel warm, useful, and inviting. She writes about gardening, family, and the simple ways a backyard can become a place to grow, gather, and slow down.
En savoir plus
How to Prepare Your CedarCraft Elevated Planter for Planting
If you are new to elevated gardening, planter setup can feel like one more thing to figure out, but it is actually pretty simple. Start by placing the funnel into the fill tube so it is ready for the final watering step. Use a raised garden or elevated garden soil mix, since it creates a lighter, healthier space for roots to grow. As you add the soil, moisten it as you go so the planter starts out evenly prepared for planting. After that, smooth the top, make room for your plants, and get them settled in. The last step is filling the reservoir with water using the funnel, which helps the planter provide steady moisture and makes the whole setup easier to manage.
En savoir plus